
The DIY Fix is reader supported. When you buy after clicking a link on our site, we may earn an affiliate commission.
In this review we will be looking at KA tanking slurry. This is a waterproofing system that can stop water ingress and leakage. This makes it a great solution for blocking all kinds of penetrating damp, and in some cases rising damp. We will be looking at the benefit of using this product as a waterproof barrier. As well as what you will need to apply the slurry.
This review is based on a real job, where I used KA tanking slurry to waterproof a slightly damp stone out building/shed.
What is KA Tanking Slurry?
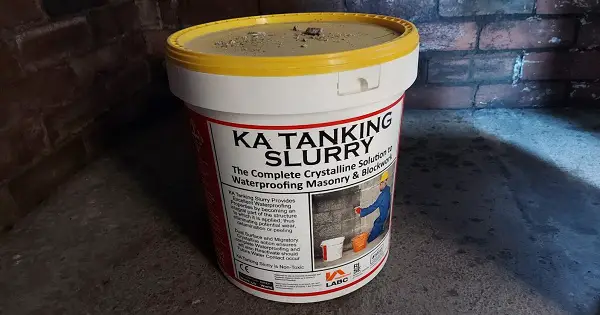
KA Tanking Slurry is a cementitious waterproofing system, that can be used on a variety of surfaces, to stop water from penetrating through. It works by soaking into the pours and capillaries of the surface it is being applied to.
Once dried, the slurry will form insoluble crystals. This essentially plugs the capillaries of the surface and forms a fully waterproof barrier. According to the manufacturer, this will provide a completely watertight barrier. This barrier will last for the life of the surface it is applied too.
KA tanking slurry can be applied to a variety of different surfaces. These include blockwork, brickwork, concrete, and cement renders. This means it can be used in many different situations to act as a waterproofing solution.
A few examples of use include:
- Garages and stone sheds
- Basements.
- Bathrooms and kitchens
- Retaining walls
- Foundation slabs for sheds and other outbuildings
- Sealing swimming pools prior to tiling
- Plus, many other residential and commercial applications
Essentially, anywhere that water can penetrate, can potentially benefit from tanking slurry application.
The job I used KA tanking slurry for
The job I used KA tanking slurry on, was a stone outbuilding, on a ex council property. The original use of this building was an outside toilet and bin store. It needed to be completely damp proofed, as it was being converted into a small office.
The existing structure suffered from a small amount of damp, at various points. This was mainly coming through one of the walls and a small section of the floor. As a result, I decided to add slurry to all surfaces including the ceiling.
The surface area that needed covering was approximately 24m2. This would need 2 coats of tanking slurry to provide a complete barrier.
According to the manufacturer’s website, KA tanking slurry coverage is 16m2 per 25kg tub. This meant I needed exactly 3 tubs to cover the entire area. This was surprisingly accurate, and all the materials were used to complete the job.
Preparing and applying KA Tanking Slurry
Before applying the tanking slurry, you will need to make sure the surface is clean and clear of any loose material. This includes any paint or lose mortar etc.
On my job this included stripping paint from the wall and ceiling, that was once the toilet. For me this was the worst part of the job. It was very tedious. I did this with a wallpaper scraper and a wire brush.
Once the surface was free of paint I completely swept and hoovered the surfaces to remove all dust and dirt. Next, I proceeded to wash the surfaces with a garden hose. This was recommended by the instructions on the tub. They claimed that saturating the surface would help the tanking slurry to adhere.
All this prep was done the day before applying the tanking slurry. The next day I went back around the shed with a brush and used a garden sprayer, to add another small spray of water to the surface prior to application.
The tanking slurry comes in powder form, so you do need to mix it yourself. This is quite easy. Simply add a small amount of water into the bottom of a bucket (I added roughly 1 Litre) then proceed to add the powdered tanking slurry to the water whilst mixing.
I found the best consistency was similar to mixed plaster (just a little thicker). Once fully mixed the tanking slurry had a silky consistency. If you stuck a masonry brush into the bucket it would stand up straight.
This consistency had several advantages:
- The coverage was very good. It filled any cracks or deep mortar joints.
- The tanking slurry was relatively easy to apply with a masonry brush.
- It was stiff enough that there was not much waste from tanking slurry splattering off onto the floor (this was more of a challenge when applying to the ceiling)
ka tanking slurry drying time
This entire job was pretty much completed in 1 day (2 coats). It just needed revisiting for about 30 minutes the following day to add a second coat to the floor.
I started at roughly 9AM and applied the first coat to the walls and ceiling. This took a couple of hours (steady away). Once I had completed the first coat, I had some dinner and watched a bit of TV whilst the tanking slurry dried.
It was a warm day, so it did not take long for the walls to become dry to touch. Once they were at this point, I sprayed the walls again with a handheld water sprayer (this again was recommended on the instructions). Then I proceeded to repaint the walls with a second coat of tanking slurry.
One additional thing to mention regarding the second coat, is it should be applied at 90 degrees to the previous coat. In my case this was vertical brush strokes on the first coat and horizontal brush strokes on the second coat.
Once the second coat was on the walls and ceiling I scraped and brushed the floor. Next, I washed the floor with a bucket and water. This just made sure the surface was completely clean and slightly damp.
Then I painted myself out of the room with tanking slurry on the floor.
For the slurry on the floor I made the mixture just a little wetter. Not much, but just enough to make it easier to spread with a soft sweeping brush.
The following day I used the remaining tanking slurry to go over the floor with a final coat.
Tools and materials used
The tools and materials for this job were quite simple. You just need tools to mix and apply the tanking slurry. You can see everything I used below.
- 3 X 25kg tubs of KA Tanking Slurry. Each tub can cover 16m2. That is 8m2 for two coats. As this job was roughly 24m2, this was exactly 3 tubs. The best price for this was on Amazon. This came in around £7 cheaper per tub than other places that stocked it, such as Wickes. Plus, Amazon deliver it to your door.
Click here to view KA Tanking Slurry on Amazon and read more reviews - Masonry brush. This was recommended on Amazon when I bought the tanking slurry. I cannot complain it did the job and was a good quality brush.
- A good bucket. You can get one of these from anywhere. Local builders’ merchant, B&Q, Wickes.
- Cordless drill and a whisk. You can maybe get away with doing the mixing by hand (I didn’t try) but my cordless drill and whisk got the tanking slurry nice and smooth.
You can use any cordless drill. I just have a small DeWalt cordless drill for these types of small DIY jobs. Click here to see the drill I used
And you can see a similar whisk to the one I used by clicking here - Finally make sure to use the correct PPE. As with any building materials you don’t want this stuff in your eyes, or in too much contact with your skin.
Make sure you have a decent pair of gloves and eye protection.
Conclusion
Overall, I am very happy with the product. It did exactly what it said on the tub.
I did want to include a list of pros and cons. As I wanted to make sure this was a completely balanced review. However, there is not really anything to complain about.
- Its reasonably priced. It cost me less than £100 to completely waterproof an entire room.
- It mixes very well. There were no lumps and it was smooth and ready to apply in minutes.
- It was very easy to apply with a brush. No real skill required.
- Finally, it seems to have worked well. Since applying it to the room, there has been no penetrating damp.
All in all, I am very pleased with this tanking slurry and would definitely use it again.
I hope you found this KA tanking slurry review helpful. If you want to read more product details, and even more customer reviews