The DIY Fix is reader supported. When you buy after clicking a link on our site, we may earn an affiliate commission.
In this article, we will be looking at what causes condensation, and whether insulated plaster boards are a good solution to stop it.
Condensation effects most homes to some extent. This is because all households will produce a significant amount of moisture throughout each day.
This moisture will come from bodily functions, like sweating and breathing, as well as household chores like cooking, drying clothes and taking showers and baths.
Ideally, most properties will have reasonably good ventilation and airflow, to keep condensation at a minimum. This might include, air bricks and grates, extractor fans, as well as regular open doors and windows, to allow moist air to leave the property, and fresh air to circulate in.
However, this can be easier said than done and many properties have poor ventilation. Also, in colder winter months, we are all far less likely to open doors and windows, especially when the heating is on.
As a result, moisture is trapped in the warm air in our property, ready to settle on surfaces and cause condensation.
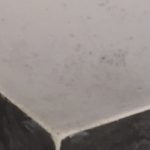
Condensation occurs when warm moist air hits a cold surface. At this point the water vapour condenses and turns back to liquid water on the surface.
Common places this will occur include:
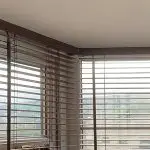
- On and around windows and external doors.
- Behind furniture and other areas with poor airflow
- Any surface in a high moisture area, such as a bathroom or kitchen
- And finally, on cold external walls
Wherever this happens it is frustrating, as eventually mould will form and cause damage to your internal decoration.
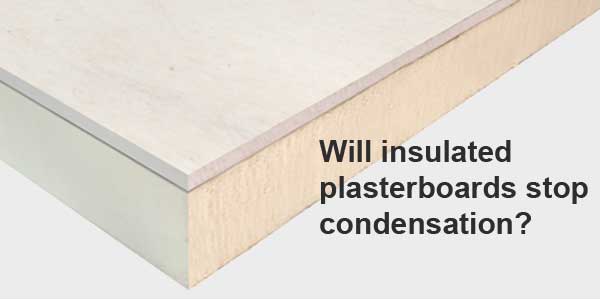
Insulated plasterboard can be a great way to stop condensation on external walls. By adding a layer of insulation, you raise the surface temperature of the wall. This will mean that it no longer acts as a dew point for warm moist air.
How to install insulated plasterboard to stop condensation
There are two main ways you can install insulated plasterboard:
- Dot and dab
- Timber batons
Dot and dab – drywall adhesive
Fixing insulated plasterboard’s with a drywall adhesive, should only be used on cavity walls, or solid rendered walls, where there is no risk of penetrating damp.
If moisture penetration is a potential issue, this could affect the integrity of the fixing and cause the board to come away from the surface in the future.
If you can install with dot and dab, you should ensure that the surface is completely clean, dry, and free of debris.
You can also use a bonding agent on the wall prior to instillation. This will reduce suction and create a better key for the adhesive to take hold.
The major advantage of using dot and dab, as opposed to battens, is you can easily correct irregularities in the surface of the wall with the dabs. The dabs will give a certain amount of play and allow you to adjust the board until it is completely straight and plumb.
Due to this, it will be the preferred method for most professional plasterers and builders, as it is much quicker and easier. But remember, just because it is the easiest option, it is not necessarily the best.
If you think the wall may not be suitable for this method, then it’s probably not a good idea to wing it and hope for the best.
Timber battens
If you are in any doubt about future penetrating damp, then battens are probably a better option.
This method will require a little more work, as the battens will need installing mechanically with plugs and screws. You may also need to pack out the timber battens to ensure the surface is completely flat and plumb.
For someone with less experience, it can be quite difficult to achieve a completely flat surface to fix your insulated boards too.
The best way to make sure your surface is completely flat, is to use a spirit level and find the area furthest out from the surface. Here your timber will be placed directly on the wall, and you can pack out from this point.
When the wall is packed out and fully installed correctly, the battens should create a completely flat and plumb surface to fix too. This can be checked with a spirit level, placed vertically for plumb, and across the battens horizontally, to ensure you are fixing to an even and flat surface.
It is also advised that you add a strip of damp proof course (DPC) behind the timber battens when fixing. By adding this you will add extra protection against any moisture passing from the wall into your treated timber battens.
DIY or hire a professional
Whether you do the job yourself or hire a professional, will depend on your own level of experience.
If you are quite competent at DIY, then you may be able to install the boards, especially if you are installing with a drywall adhesive, which is a reasonably simple process.
The battens could also be doable for the experienced DIY’er. This is providing the walls are relatively flat, and don’t require major adjustments.
However, if you are not confident to carry out the work, most local plasterers will be able to do this type of job, in as little as 1-2 days.
Also, if you already have materials, then you should just be paying a day rate for labour. This could be anywhere from £150 – £300 per day depending on who you hire.
A good way to get a really good price, and hire the best person for the job, is to get multiple quotes. You can easily do this with an online comparison service.
The main advantages are:
- All the plasterers on these sites are rated and reviewed by previous customers.
- They are fully vetted by the comparison service
- They have a profile with info about the company, plus all their qualifications.
- The companies are all competing for your job. This can mean big discounts. We have seen as high as 40% off for plastering jobs.
Essentially, you get the best possible price, plus there is no chance of hiring a cowboy.
To see our favourite comparison site and get online quotes from up to 5 local plasterers Click Here.
Why insulated plasterboard isn’t a cure-all
So, you have your insulated plasterboard installed and there is no more condensation on the wall.
Problem solved, right?
It may have solved this problem, but the moisture needs to go somewhere. By just fixing this issue and not removing the moisture in the air, you are likely to get more condensation in other areas.
Even when your walls are insulated, you should still ensure that you reduce moisture in the air. That way you won’t have more problems arising in different areas of your home.
Some simple actions can reduce humidity and moisture in your home considerably, these include:
- Opening windows and doors, especially when lots of moisture is being created (cooking, bathing, etc).
- Install an extractor fan in rooms like your bathroom and kitchen. This can have a huge impact on removing moisture from the air.
- Use a dehumidifier. Dehumidifiers suck in moist air, when this happens, water condenses on a refrigerated area inside the machine, following this it is stored in a reservoir, which you can empty when its full.
- Try to avoid drying clothes inside. If you have too, use one of the methods above to extract the moist air.
These are just a few ideas that can help. Any of these can have a significant impact on condensation in your home.
Conclusion
Insulated plasterboard’s are a great way to stop condensation. They are a particularly good way to increase the surface temperature of internal walls.
Just remember, condensation will still happen in other areas, if you fail to effectively remove moisture in the air.
It is also important to note, that covering more serious problems, such as penetrating damp is never a good solution. Always try to resolve the main issue that is causing damp and condensation.